
By: Lucas Trabuchi
In today’s digital age, mobile applications have become an integral part of our lives, making mobile app testing an absolute necessity, wouldn’t you agree? Well, Mobile Automation testing is a skill that can elevate your capabilities, and it shares similarities with Web Automation until you get to the setup phase.
Setting up Appium may seem straightforward after you’ve done it a few times, but the initial experience can be daunting. First-timers often find themselves grappling with a multitude of tutorials, videos, and documentation. That’s why I’ve taken the initiative to craft a Medium article aimed at assisting those who are embarking on this journey for the first time!
Let’s list the things that we should install, shall we?
Setup:
- Appium Doctor
- Node
- Java
- Appium Inspector
- Android Studio
- Environment variables: Android_HOME and JAVA_HOME
- Carthage (Mac)
- Xcode (Mac)
- Xcode command line (Mac)
- MiniSim
- Custom commands to run your simulators.
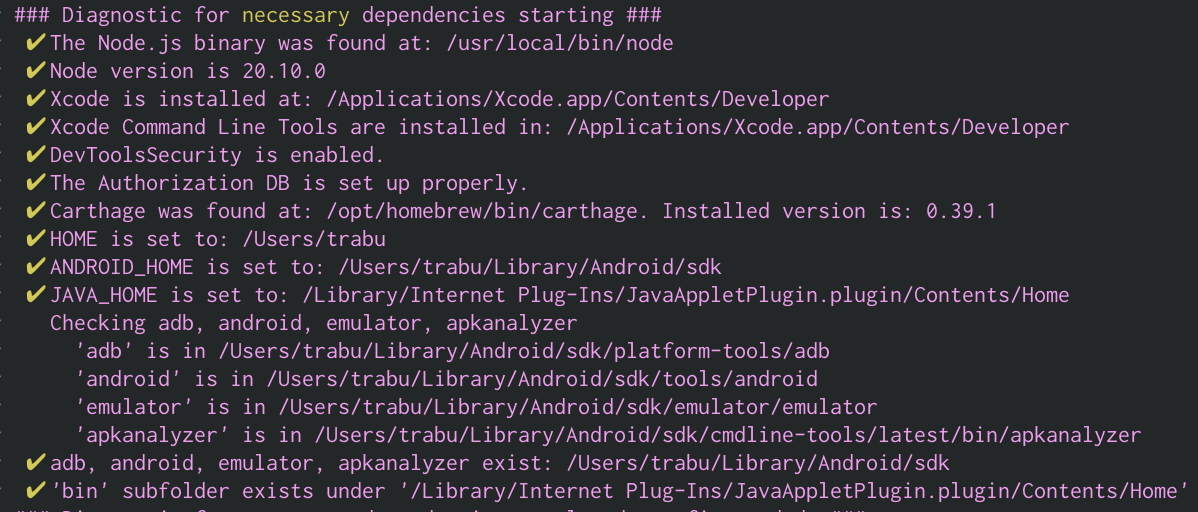
Before proceeding to the next step, it’s essential to install Appium Doctor. This tool will assist us in identifying the necessary components and any missing dependencies.
Just run:
npm install appium-doctor -g
And after that run it by entering:
appium-doctor
Let’s start with the simplest step: installing the Java SDK, Node, and Appium Inspector directly from their official websites:
- Node: https://nodejs.org/en/download
- Java: https://www.java.com/download/ie_manual.jsp
- Appium Inspector: https://github.com/appium/appium-inspector/releases
Android Setup:
- Install Android Studio: https://developer.android.com/studio
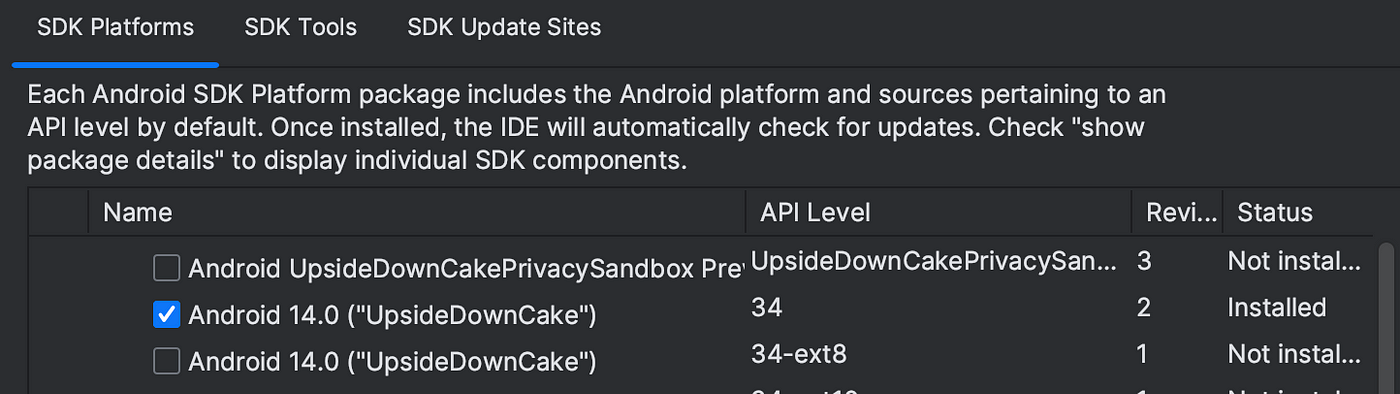
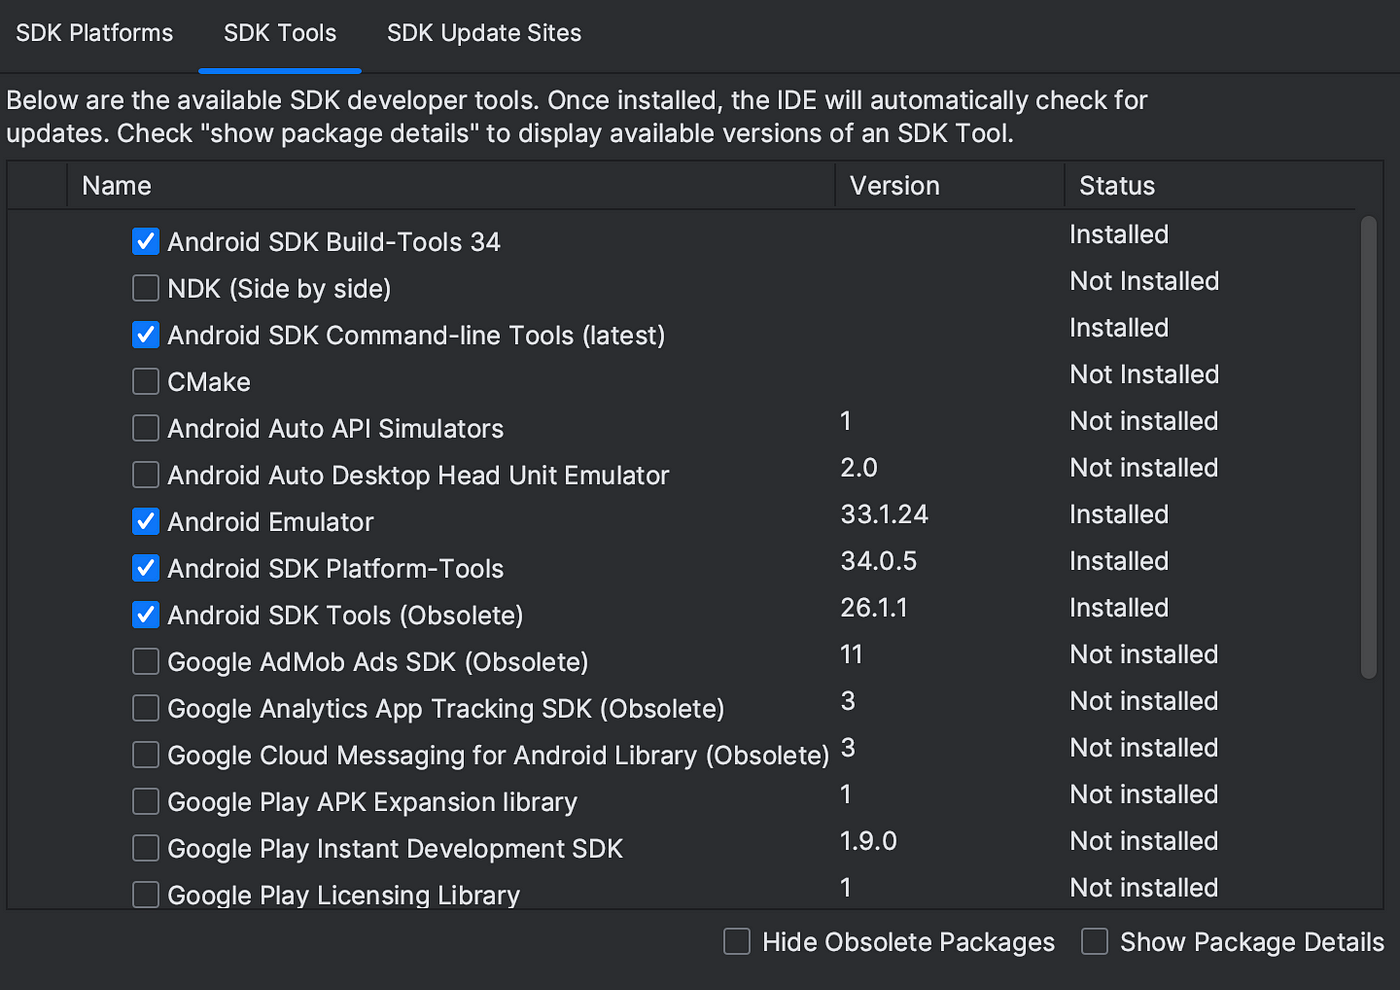
Install the following options from the SDK Manager:
- At least one Android OS:
- From the SDK Tools install the following options (be aware that you may not have some options, so please uncheck the “Hide Obselete Packages”).
Environment variables:
Now, We have to set up the ANDROID_HOME and JAVA_HOME, and this is pretty simple!
ANDROID_HOME
The Android SDK path is just right above of the SDK Platform tab
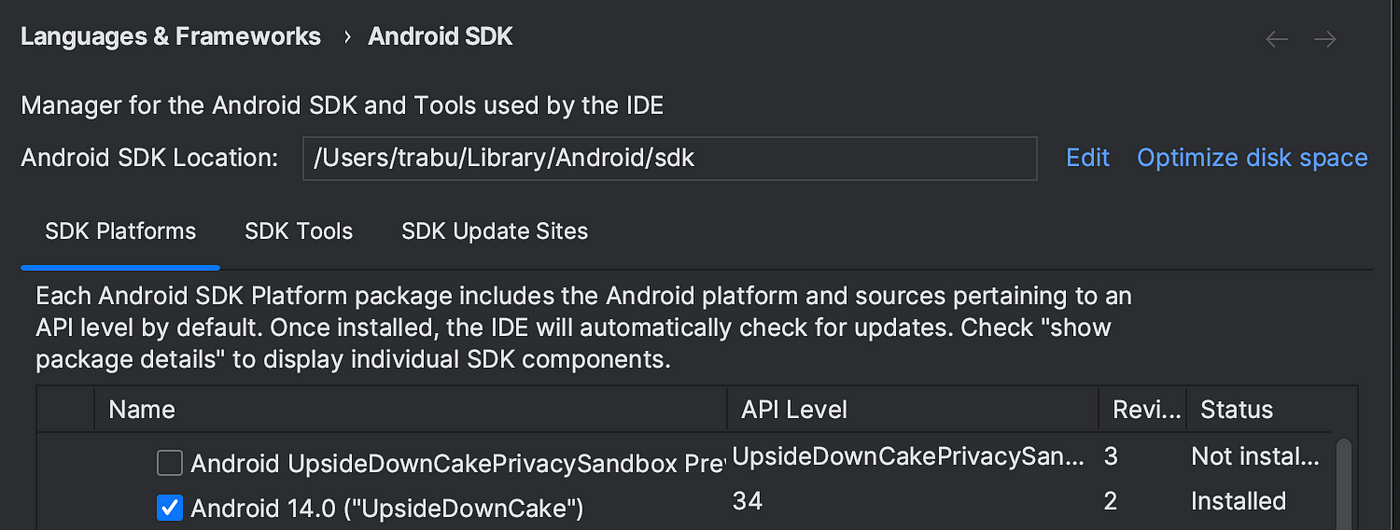
So, copy that path and let’s paste it into our zshrc
First, open the zshrc file.
nano ~/.zshrc
And Add these lines (remember to update the username):
export ANDROID_HOME=/Users/trabu/Library/Android/sdk
export PATH=~/Library/Android/sdk/tools:$PATH
export PATH=~/Library/Android/sdk/platform-tools:$PATH
Let’s close the file and then run
source ~/.zshrc
JAVA_HOME
The instructions are the same as above
Add this line to your zshrc and don’t forget to close the file and run the source command again from above.
export JAVA_HOME=/Library/Internet\ Plug-Ins/JavaAppletPlugin.plugin/Contents/Home
ONLY FOR MAC:
- You can install Xcode from the appstore.
- Carthage will be installed by running this command (You have to had brew installed.)
brew install carthage
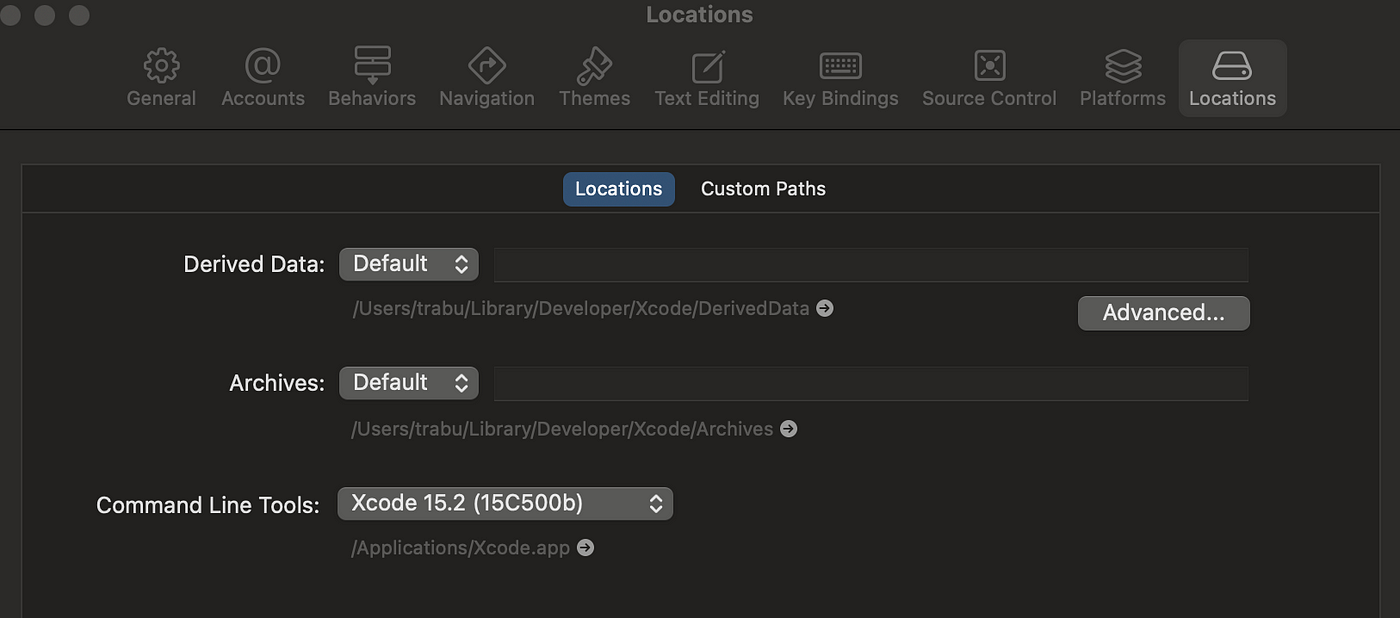
- Xcode commands line tools are already installed but you have to change the Command Line Tools option from the Location section and Select the Xcode version!
- Xcode > Settings > Locations
Appium Inspector Configuration:
Android
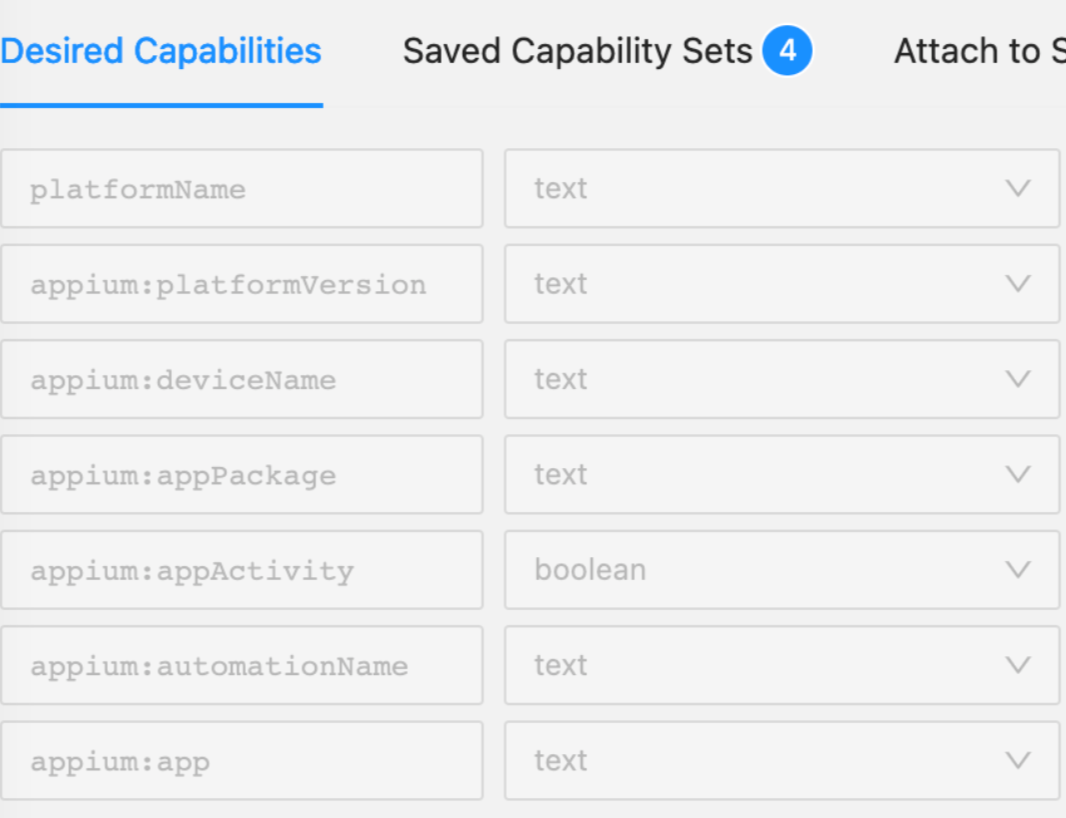
- platformName: Android
- platformVersion: your OS version
- deviceName: Device Name
- appPackage: Your appPackage
- appActivity: Your appActivity
- automationName: UIAutomator2
- app: The path to your .apk
How to find the appPackage and the appActivity?
- Open one of your Android Simulator
- Open the application in your Simulator
- Open your terminal and run
adb shell
dumpsys window displays | grep -E 'mCurrentFocus'
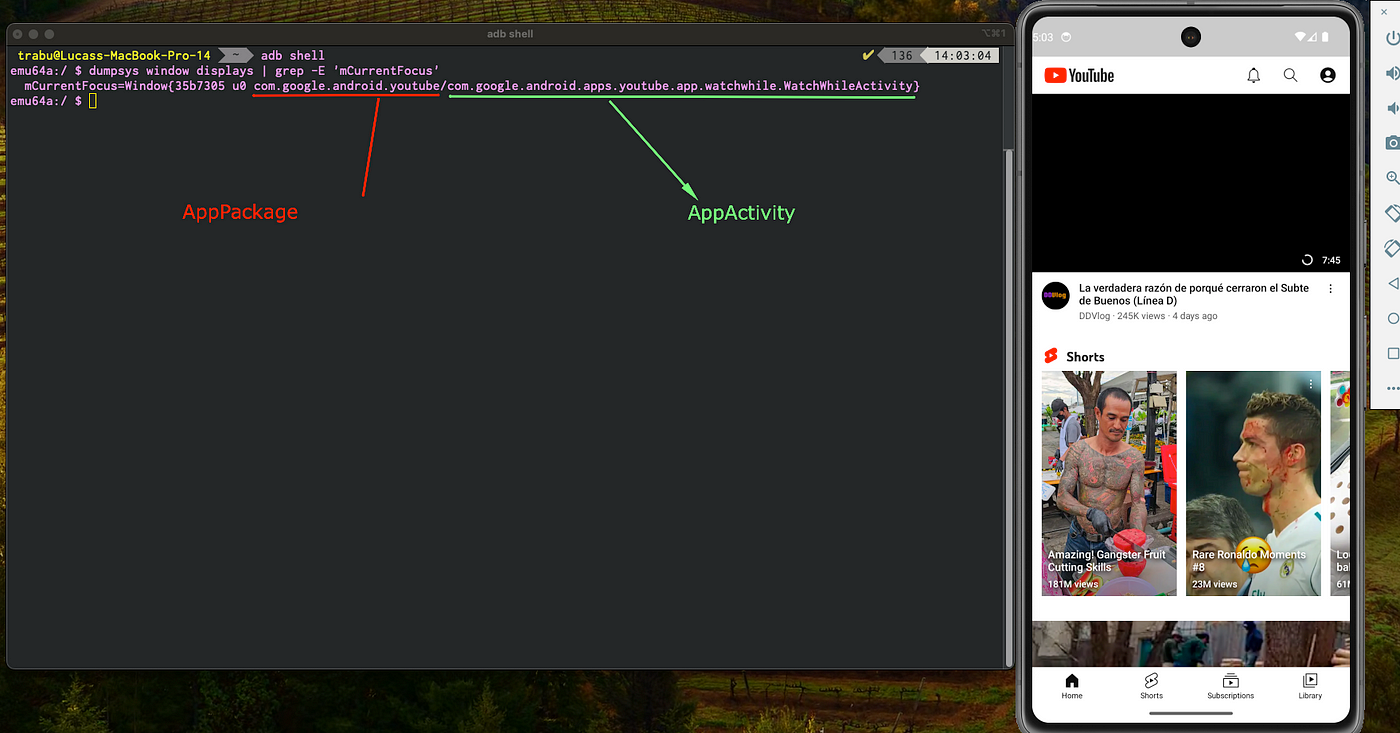
BTW, If you have trouble with adb command, such as ADB command not found, please check if you have added ALL environments variables to your zshrc file!
iOS
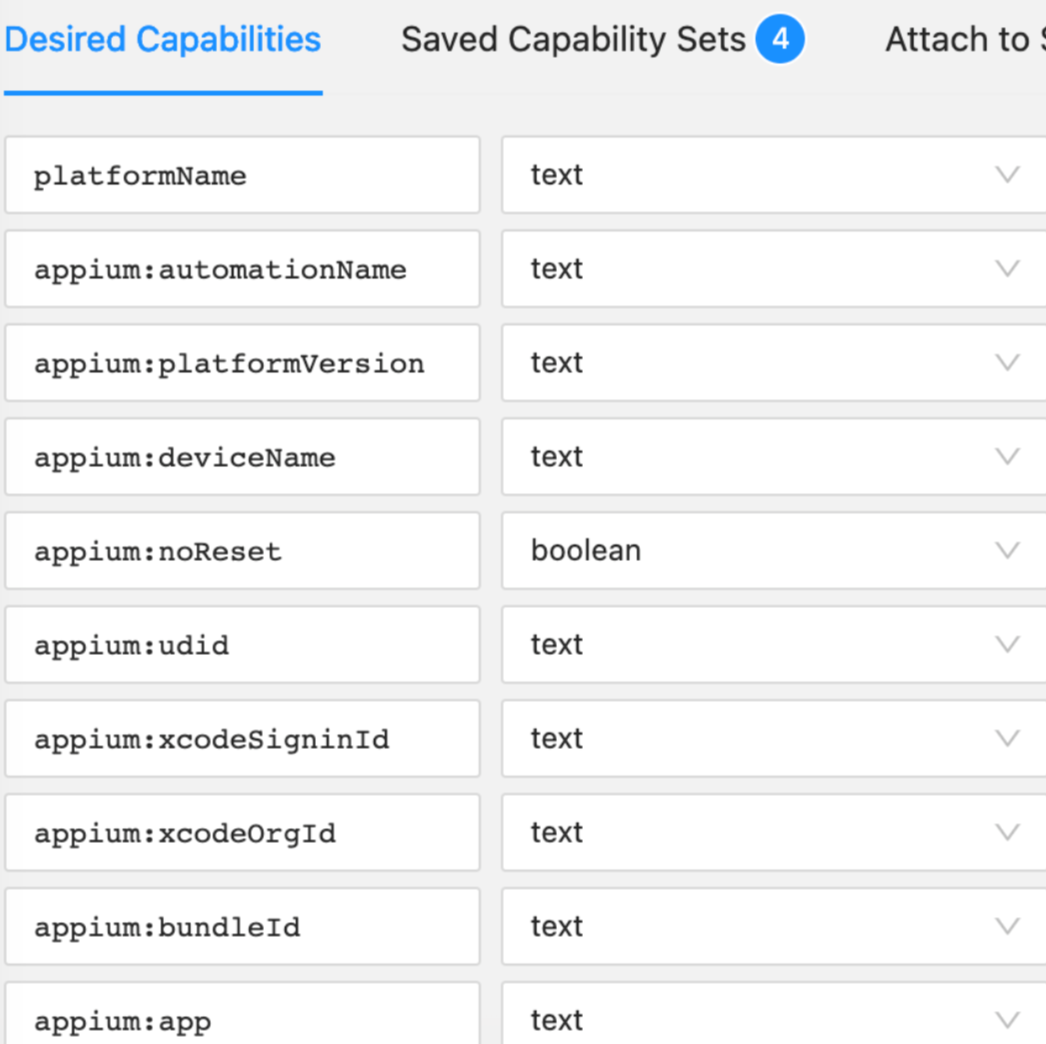
- platformName: iOS
- automationName: XCUITest
- platformVersion: your OS version
- deviceName: Device Name
- udid: Your device udid (you can get it by running
xcrun simctl listin your terminal) - xcodeSigninId: iPhone Developer
- bundleId: similator to the appPackage for Android (ask your team)
- xcodeOrgId: Ask this to your Team
- app: The path to your .app (NOT .ipa)
And now you are ready to go!
BONUS:
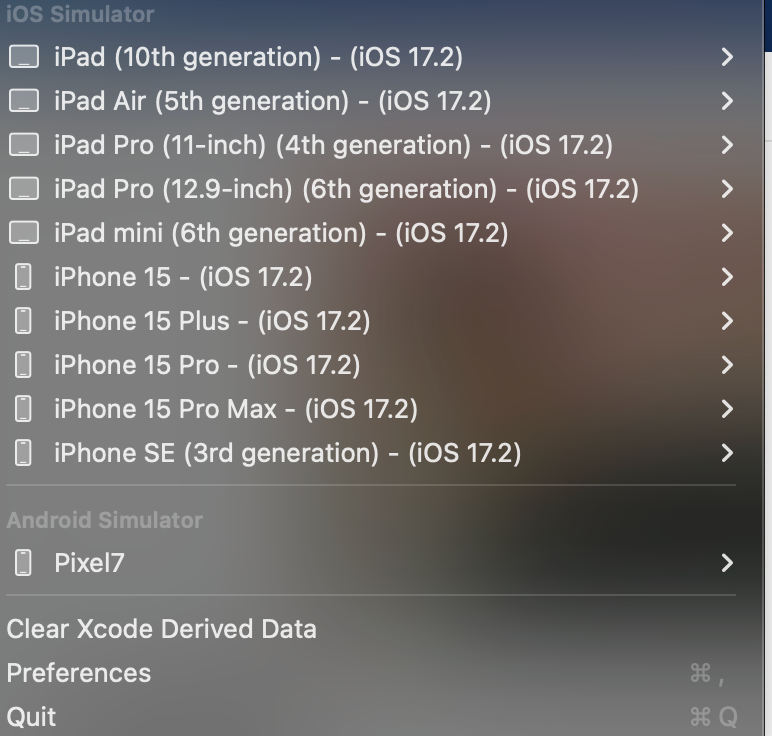
- MiniSIM (just for Mac though)is an application that will list all of your iOS and Android simulators that you have installed:
Would you rather use the command line?
Add these commands to your zshrc file.
Android Command:
Android-start() {
echo Select an emulator to start:
# avds=($(emulator -list-avds))
select em in $(emulator -list-avds) exit; do
case $em in
exit) echo "exiting"
break ;;
*) echo "Starting: $em"
emulator -avd $em
break ;
esac
done
}
iOS Command:
ios-start() {
echo "List of iOS simulators:"
xcrun simctl list devices | grep "(Booted)" --invert-match
echo "Write the exact name of the simulator you want to use:"
read device # This line will allow you to input the device name
echo "Booting the simulator: $device"
xcrun simctl boot "$device"
}
- Edit your .zprofile or zshrc file (
nano ~/.zshrcornano ~/zprofile) - Paste the function to the end of the file
- Close the file and save the changes (Control/Command + X )
- Close your terminal or run the following command:
source ~/zshrcorsource ~/zprofile - Run:
android-startorios-start
Happy testing!